Clark C30 C40 C50 CF30 CF40 CF50 CY40 CY50 CFY40 CFY50 Forklift Service Repair Workshop Manual
Clark C500 & C500Y 60 70 S80 80 90 S100 Forklift Planned Maintenance & Adjustment Procedures Manual
Honda FourTrax TRX250X 1987-1988 Factory Service Repair Manual
CLARK C500 Y950 CH Container Handler Service Repair Manual
Diesel Engine ECU Fault Code Repair Database PDF | DTC Diagnostic & Troubleshooting Library
CLARK C500 Y800 80,000 lb Forklift Overhaul Service Repair Manual – Cummins Diesel
CLARK C500 Y180 Y200 Y225S Y225L Y250S Y250L Y300S Y300L Y350 Forklift Service Repair Manual
CLARK C500 Y160-S250 & Y1625 Forklift Overhaul Service Repair Manual | OH-354D
CLARK C500 Y110 Y135 Y155 Planned Maintenance Manual | Perkins Diesel
CLARK C500 Y60-Y100 Planned Maintenance Manual PMA-452
CLARK C500 Series Forklift Overhaul Service Repair Manual (OH-370)
CLARK C500 PMA-534 Planned Maintenance Manual
CLARK C500 Forklift OH-339 Overhaul Service Repair Manual
CLARK C500 Forklift Overhaul Instructions Service Repair Manual | LP & Gasoline
CLARK C500 OH-433 Overhaul Instructions Manual PDF | 11,000-15,500 lb Forklift
CLARK C500 OH-431 Overhaul Instructions Service Repair Manual PDF – Diesel Forklift (10,000–12,000 lb)
CLARK C500 Clarklift OH-429 Overhaul Instructions Manual | Perkins Diesel Forklift
CLARK CLARKLIFT C500 Forklift Overhaul Instructions Manual
CLARK C500 915 Perkins Gas Overhaul Service Repair Manual
CLARK C500 685 Series Operators Manual PDF | Operation & Maintenance


Getting Started
Table of Contents
2
PC, Communication Hardware, and Cable Requirements
3
Setting Up the Communication Adapter 3 5
Configuring Cat Electronic Technician to use the Communication Adapter 3 8
SETTING UP THE WIRELESS CA3 (W-CA3) RADIO (OPTIONAL)
9
SETTING UP THE CAT COMMUNICATION ADAPTER II
13
Setting Up the Cat Communication Adapter
18
Installing Cat Electronic Technician
20
Installing Cat Electronic Technician with WinPcap
25
Removing Cat Electronic Technician
28
Licensing Cat Electronic Technician
29
Steps to License Cat Electronic Technician 30
To license Cat Electronic Technician offline: 31
31
To deactivate the license in Offline mode 32
33
36
Troubleshooting Tips and Error Code Information
37
Cat Communication Adapter II Error Codes 40
41
42
Cat Electronic Technician Distribution Website
43
44
Introduction
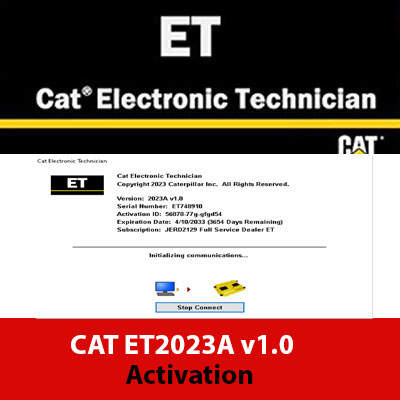
Cat® Electronic Technician (Cat ET) is a service tool designed to run on a personal computer (PC) under Microsoft Windows™.
All service tool documentation assumes the user has some Microsoft Windows experience. Users who do not have Microsoft Windows experience should take time to familiarize themselves with their supported version of Windows before installing the service tool.
The data and menus displayed in the illustrations of this manual may be different from those displayed by the service tool. This is because many different Electronic Control Modules (ECMs) are serviced with Cat Electronic Technician. Additionally, the appearance of Cat Electronic Technician varies between different versions of Microsoft Windows operating systems.
PC, Communication Hardware, and Cable Requirements
To run the service tool, the following PC, communication hardware, and cable requirements must be met.
NOTE: The minimum configuration requirements should not be used as a standard when buying new PCs for service tool purposes. If the existing equipment meets these minimum requirements, it will run the service tool.
PC Requirements
Minimum Requirements
2 GHz processor with multiple cores
2GB RAM
2GB of available hard disk drive
Screen with 1366x768 or higher resolution
Microsoft Windows™ 10 Home, Pro or Enterprise, or Microsoft Windows™ 11 Home or Pro
Note: The Microsoft Surface Pro is supported.
A pointing device, such as a mouse or touchpad, or touch screen
Microsoft Edge v80 or newer, Google Chrome, Mozilla Firefox, or any Chromium based browser
A method to install the software, such as a reliable internet connection, USB drive, DVD drive or CD drive
Recommended Requirements
2.0 GHz processor with 4 cores
4GB RAM
5GB of available hard disk drive
15.4 inch screen with 1600x1200 or higher resolution
Microsoft Windows™10 Home, Pro or Enterprise, or Microsoft Windows™ 11 Home or Pro
Note: The Microsoft Surface Pro is supported.
A pointing device, such as a mouse or touchpad, or touch screen
Microsoft Edge v80 or newer, Google Chrome, Mozilla Firefox, or any Chromium based browser
A method to install the software, such as a reliable internet connection, USB drive, DVD drive or CD drive
Communication Adapter Requirements
9-pin RS232 serial port or USB-to-serial adapter (for use with Comm Adapter II and certain Product Link modules)
USB 1.1, 2.0 or 3.0 port, (use with Comm Adapter 3)
Ethernet RJ45 connector (for use with Ethernet service)
Wi-Fi (for the Wireless Comm Adapter 3)
Note: If the entire screen is not visible, click the
maximize button to fill the screen.![]()
Communication Hardware
Caterpillar offers several options for communication hardware. Communication Adapters are service tools consisting of a portable hardware adapter and a software PC program designed to run under Microsoft® Windows™. MPSI Pro-Link is a portable computer diagnostic analyzer. To service using Cat Electronic Technician, one of the following devices is required:
Cat Communication Adapter 3
For additional requirements, see “Setting up Cat Communication Adapter 3”.
OR -
Cat Communication Adapter II
For additional requirements, see “Setting up Cat Communication Adapter II”.
OR -
Cat Communication Adapter
For additional requirements, see “Setting up Cat Communication Adapter”.
Note: Engines that do not have the service connector may also require the 140-9442 ATA/CDL T-Adapter.
Note: For specific part number information, contact the Parts Department of your local dealership.
Exceptions
The requirements for Hydraulic Excavators B-Series (HEX) are the following:
Cable Assembly HEX to PC Adapter cable
In the Communications tab of the Preferences dialog box, select the “Communication Adapter” option
f rom the “Communication Interface Device” drop-down list. Then click the “Advanced” button. Select the “19200 baud rate” radio button. Click “OK”.
Note: For specific part number information, contact the Parts Department of your local dealership.
Setting Up the Communication Adapter 3
Requirements
538-5051 - Cat Communication Adapter 3 Group The following equipment is included in this group:
Description |
Cat Communications Adapter 3 |
Data Link Cable |
USB PC connector |
Carrying Case |
Block/Foam for carrying case |
Communication Adapter 3 CD-ROM |
Note: For specific part number information, contact the Parts Department of your local dealership.
Instructions
To connect the Communication Adapter 3, (“Comm Adapter 3”) to the PC, perform the following steps:
Step 1 Align and attach the DB25 connector end of the USB PC cable to the “PC cable” end connection on the Comm Adapter 3. Please note that, depending on the device, the label on this end of the Comm Adapter 3 could read either “PC cable” or “Computer”.


Step 2 Plug the USB Connector end of the PC cable into the USB port of the PC.

To connect the Comm Adapter 3 to the data link, perform the following steps:
Step 1 After connecting the Comm Adapter 3 to the PC, connect the DB15-style connector end of the data link cable to the “Data Link” connection on the Comm Adapter 3.

Step 2 Connect the other end of the data link cable to the service connector on the product.

The lights on the front of the Comm Adapter 3 will glow and then will sequentially turn off from the top (“Data Link” end) to the bottom (“Computer” end) of the device. The Power LED will turn color from orange to red, and then the blue "USB" LED will blink once. The CA3 will not be operational until this sequence has occurred. The sequence can take up to 10 seconds. The service tool is now ready to be started. Check the LED lights on the front of the device.
Note: The Power light on the Comm Adapter 3 will glow if the data link is powered (machine power is on) or if the USB connector is plugged into the PC.
Note: For more information on the Comm Adapter 3, please refer to the Caterpillar Communications Adapter 3 Tool Operating Manual.
Configuring Cat Electronic Technician to use the Communication Adapter 3
In order for Cat Electronic Technician to work with the Communication Adapter 3, the settings must be changed to select the Communication Adapter 3 as the Communication Interface Device:
Step 1 Start Cat Electronic Technician.
Step 2 Click the “Stop Connect” button when it appears. Step 3 Select the “Utilities” menu.
Step 4 Choose “Preferences > Modify...”. Step 5 Click the “Communications” tab.
Step 6 Select “Cat Comm Adapter 3 (RP1210)” and click “OK”.
Note: Because a growing number of products require multiple data link service, the “Enable Dual Datalink Service” checkbox has been pre-selected. Servicing ECMs on more than one data link requires this checkbox to be enabled. Failure to do this will result in undetected ECMs and reduced functionality.
Setting Up the Wireless CA3 (W-CA3) Radio (optional)
Requirements
317-7493 - Cat Wireless Communication Adapter 3 Radio The following equipment is included in this group:
Description |
Cat Communications Adapter 3 |
Cat 802.11 Wireless Radio |
Wireless Radio CA3 Cable |
Wireless Communication Adapter 3 CD-ROM |
Wireless Communication Adapter 3 User's Manual |
Note: For specific part number information, contact the Parts Department of your local dealership.
Note: The WCA3 is not compatible with Windows 10 or later.
Instructions
To connect the Wireless CA3 Radio to the Comm Adapter 3, perform the following steps:
Step 1 Align and attach the round end of the Wireless CA3 Radio cable to the cable connection on the Wireless CA3 Radio.

Step 2 Connect the other end of the cable to the cable connection on the CA 3.

To connect the Communication Adapter 3 to the data link, perform the following steps:
Step 1 After connecting the Communication Adapter 3 to the Wireless CA3 Radio, connect one end of the data link cable to the data link connection on the CA 3.

Step 2 Connect the other end of the data link cable to the service connector on the product.

If the data link is powered (machine power is on), the Power light on the Communication Adapter 3 will glow and the diagnostic test will begin. The lights on the front of the Communication
Adapter 3 will sequentially glow from the top (“Data Link” end) to the bottom (“Computer” end) of
the device. The service tool is now ready to be started.
Note: For more information on the Wireless CA3 (W-CA3) Radio, please refer to the Wireless Radio for Communication Adapter 3 Manual.
Configuring Cat ET to use the Wireless CA3 Radio
In order for Electronic Technician to work with the Wireless CA3 Radio, the settings must be changed to select the Wireless Comm Adapter 3 as the Communication Interface Device:
Step 1 Start Cat Electronic Technician.
Step 2 Click the “Stop Connect” button when it appears. Step 3 Select the “Utilities” menu.
Step 4 Choose “Preferences > Modify...”. Step 5 Click the “Communications” tab.
Step 6 Select “Wireless Communication Adapter” and click “OK”.
Setting Up the Cat Communication Adapter II
Requirements
171-4400 - Cat Communication Adapter II Group
Note: The 171-4400 Cat Communication Adapter II may be used; however, it is no longer available for purchase from Caterpillar Inc.
Note: For specific part number information, contact the Parts Department of your local dealership.
The following equipment is included in this group:
Description |
Cat Communication Adapter II |
Data Link Cable (24 inch) This cable must be used for J1939/11 communications. |
Serial PC Cable (25 foot) |
Carrying Case |
Block/Foam for carrying case |
Communication Adapter II CD-ROM and User's Manual |
Requirements:
Description |
In-Cab Adapter Cable for ATA |
In-Cab Adapter Cable for the J1939/11 |
Serial PC Cable (10 foot) This cable can only be used with the Cat Communication Adapter II |
Parallel PC Cable (25 foot) IEEE 1284 (male to male connector) This cable is for PCs that do not have a serial port. This cable can only be used with the Cat Communication Adapter II |
USB to Serial Adapter Kit (16 inches) |
ATA/CDL Unicable from a Cat communication adapter to the service connector NOTE: The 7X1412 ATA or 7X1570 CDL cable may also be used. However, these are no longer available for purchase from Caterpillar Inc. |
ATA/CDL T-Adapter (not required for all applications) |
Cable Assembly used to connect the Service Tool directly to the ECM. |
Main Harness |
A3 and A4 E4 stub (requires Main Harness) |
A4 E1 stub (requires Main Harness) |
Optional Cables:
Instructions
To connect the Communication Adapter II to the PC, perform the following steps:
Step 1 Align and attach the DB25 connector end of the serial cable to the “PC Cable” end of the Comm Adapter II.

Step 2 Connect the other end (RS-232 end) of the serial cable to the communication port of the PC.

(Shown with optional USB to Serial Adapter)
To connect the Communication Adapter II to the data link, perform the following steps:
Step 1 After connecting the Comm Adapter II to the PC, connect the DB15-style connector end of the data link cable to the “Data Link” end of the Comm Adapter II.

Step 2 Connect the other end of the data link cable to the product. If the data link is powered (machine power is on), the Power light on the Comm Adapter II will glow and the diagnostic test will begin. The lights on the front of the Comm Adapter II will sequentially glow from the top (“Data Link” end) to the bottom (“Computer” end) of the device. The service tool is now ready to be started.

Note: For more information on installation procedures, consult the Communication Adapter II Users Manual.
Updating the Comm Adapter II Firmware to Serial IP
Note: Use the Comm Adapter II Toolkit version 4.0.12 or later to update the Comm Adapter II.
Note: Use the serial port only to upgrade the Communication Adapter II. Do not use the Parallel port.
Instructions
To update the Comm Adapter II Firmware, perform the following steps: Step 1 Make sure the Comm Adapter II is connected to the PC and the
Power light is on.
Step 2 Go to the Start menu on the PC. Choose “All Programs,” then click through the “Caterpillar Comm Adapters” program to the “Comm Adapter Toolkit” application.
Step 3 The Toolkit application will start up and display the Summary screen.
Step 4 Click the “Application Firmware Flash” icon
. Then click the “Select File” button. The “Select Firmware Flash File” dialog box is displayed.![]()
Step 5 The following files should be listed on the right:
ca2vi2.apf – application firmware cav3i0.0 apf – application firmware ca2v3i1.0.apf – SIP application firmware
Step 6 Highlight the ca2v3i1.0.apf file and click the “OK” button. Step 7 Click the “Begin Flash” button to start the download.
Step 8 A dialog box showing the download progress will appear. The download should take less than 45 seconds.
Note: All protocol lights on the front of the Comm Adapter II will blink while the firmware is f lashed.
Step 9 When the download is complete, a dialog box will appear, allowing a return to the Toolkit Summary screen, a return to the Flash screen, or an Exit from the toolkit.
Step 10 Click the “Exit” button.
Configuring Cat Electronic Technician to use the Communication Adapter II
In order for Electronic Technician to work with the Communication Adapter II, the settings must be changed to select the Communication Adapter II as the Communication Interface Device:
Step 1 Start Cat Electronic Technician.
Step 2 Click the “Stop Connect” button when it appears. Step 3 Select the “Utilities” menu.
Step 4 Choose “Preferences > Modify...”. Step 5 Click the “Communications” tab.
Step 6 Change the Communication Interface Device to “Caterpillar Comm Adapter II (Dual Data Link/Serial IP)” and click “OK”.
Step 7 Select the appropriate COM port (for example, “COM1”, “COM2”, etc).
This application firmware only supports serial communications.
Setting Up the Cat Communication Adapter
Requirements
7X1700 - Cat Communication Adapter Gro up
Note: The 7X1701 Cat Communication Adapter may be used; however, it is no longer available for purchase from Caterpillar Inc.
Note: The 7X1701 Cat Communication Adapter does not support the J1939 data link.
Other Requirements:
Note: For specific part number information, contact the Parts Department of your local dealership.
Description |
Communication Adapter Software SPM (Service Program Module) Version 1.2 or greater |
RS232 Serial PC Cable This cable can only be used with the Cat Communication Adapter 7X1701 |
ATA/CDL Unicable from a Cat communication adapter to the service connector Note: The 7X1412 ATA or 7X1570 CDL cable may also be used. However, these are no longer available for purchase from Caterpillar Inc. |
ATA/CDL T-Adapter (not required for all applications) |
Cable Assembly used to connect the service tool directly to the ECM |
Instructions
To connect the Communication Adapter (Comm Adapter) to the PC, perform the following steps:
Step 1 Connect the 7X-1425 RS232 cable to an available Serial Port on the PC and to the Service Tool connector on the Communication Adapter.

Step 2 Connect the 139-4166 Unicable to the control connector on the Communication Adapter and to the service connector on the product being serviced. The service tool is now ready to be started.

Installing Cat Electronic Technician
Purpose
The installation procedure described below is for Cat Electronic Technician. The installation program is designed to run under Microsoft Windows. The installation requires one (1) Install CD-ROM or go to the Dealer.cat.com/catet to download the latest version. This process will upgrade the current service tool and preserve files previously created in the service tool, such as defined Status Groups or service tool report documents.
NOTE: While the installation will run f rom a server or over a network, the service tool will not. NOTE: To install the service tool administrative rights on the computer system are required. Instructions
Perform the following steps to install Cat Electronic Technician from the Install CD-ROM:
Step 1 Close any open applications, including any connections to mainframe computers or networks.
Only Windows should be running.
Step 2 Insert the Cat Electronic Technician Install CD-ROM into the computer’s CD-ROM drive.
Step 3 Click the “Start” button on the Task Bar. From the menu, select “Run”. The Run dialog box is displayed:

Step 4 Type z:\setup.exe in the text box. If the CD is in a CD-ROM drive other than “z,” substitute “z” with the appropriate corresponding drive letter.
Step 5 Click ”OK”. The “Choose Setup Language” dialog box is displayed:

Select the language in which the InstallShield® Wizard Setup will be displayed.
Step 6 Click “OK”. The “InstallShield Wizard Setup” status box is displayed. This status box displays the progress status of the InstallShield Wizard setup.
Note: For installations 2011B and greater, the InstallShield Wizard will install Microsoft.Net Framework
4.0 if it has not previously been installed on the PC. This process may take several minutes and may require a reboot before the installation of Cat Electronic Technician can continue.
When the setup is complete, the Welcome dialog box is displayed:

Step 7 Read through the Welcome message, and then click the “Next>” button to continue the setup.
The “Software License Agreement” dialog box is displayed. Clicking “Cancel” will abort the setup process.


Step 8 Read through the license agreement. Click the “I accept the terms in the license agreement” radio button to accept the terms and conditions. Click “Next>” to continue the setup.
Step 9 Click “Next>” to continue the setup. The Ready to Install the Program dialog is displayed.

Click “Install” to continue. Click “<Back” to return to the previous screen. Click “Cancel” to abort the setup process.
Step 10 The setup process begins copying files. Click “Cancel” to abort the setup/installation process.
Step 11 When the installation has completed, the “Installation Complete” dialog box is displayed.

Click “Finish” to close the “Installation Complete” dialog box. The ReadMe file is displayed. If prompted, the computer must be rebooted in order for the finalization to complete and for the software to work.
Installing Cat Electronic Technician with WinPcap
Purpose
During the installation of Cat ET, the user will be prompted to install WinPcap. Follow the prompts for the installation.
Note: This will only occur if Cat ET or an earlier version of WinPcap has not been installed. Step 1: Click “Yes.”

Step 2: Click “Next>” to allow the wizard to guide you through the installation.

Step 3: Read the WinPcap end users license agreement and click the “I Agree” button.


Step 4: Verify that the box allowing the WinPcap driver to automatically start at the boot time is checked.
Then click the “Install” button at the bottom of the dialog box.

Step 5: Click the “Finish” button to finish the wizard setup of WinPcap.

Removing Cat Electronic Technician
Purpose
To remove the service tool, use the steps outlined below. Instructions vary depending upon the Microsoft operating system installed on the computer. This will safely remove the service tool program and should not invalidate the current license. To uninstall the service tool software, perform the following steps.
To uninstall the service tool software, perform the following steps:
Step 1 Click the “Start” button in the lower left side of the screen. Select “Settings” from the menu. Step 2 Click on the “System” icon. Select “Apps & features”.
Step 3 Select “Cat Electronic Technician”. The information box about that program opens with an Uninstall button in the lower right-hand corner.
Step 4 Click on “Uninstall”.
Step 5 Close the System box, returning to Settings.
Licensing Cat Electronic Technician
NOTE: The contents of this section apply only to Dealer Coordinators. Contact a Dealer Coordinator for information on licensing the service tool.
Accessing
There are two (2) different opportunities to license the service tool:
Running the service tool without an active license and
Selecting “License Cat ET…” from the Utilities drop-down menu in the service tool program.
To run the Service Tool without an active license:
Step 1 When Cat Electronic Technician is launched without an active license, the “Electronic Technician License” message box is displayed.
Step 2 Click the “Yes” button to license the service tool. The “Licensing” dialog box is displayed.
To select “License Cat Electronic Technician…” from the Utilities drop-down menu:
Step 1 In the service tool main screen, select the “Utilities” menu.
Step 2 Select “License Cat ET… “ The “Licensing” dialog box is displayed.
Steps to License Cat Electronic Technician
The Licensing dialog box can be used to activate or deactivate a license. This may be done through an Online or Of fline process.
Once the service tool is registered, both the Activation ID and the Serial Number should be recorded and kept in a safe place. The Activation ID will be necessary to deactivate the license (part of the transfer process). The Activation ID or the Serial Number is necessary to re-license.
Activation ID (case sensitive) Service Tool Serial Number
To license Cat Electronic Technician online:
Step 1 Select “Online” as the connection method in the “Connection Method” screen of the Licensing wizard. Click “Next>”. The “Choose Action” screen is displayed.
Step 2 Select “Activate” as the type of action to perform. Click “Next>”. The “Activate” screen is displayed.
Step 3 Obtain an Activation ID.
Open an Internet browser window and type in the following URL: https://dealersoftwarelicensing.cat.com.
The Corporate Web Security (CWS) webpage is displayed. Enter CWS Logon ID and Password in the text boxes.
Note: This option cannot be used without a CWS Logon ID.
Click the “Login” button. The “Service Systems Software Online Licensing” screen is displayed. The screen will direct the steps necessary to obtain an Activation ID.
Step 4 Enter the Activation information in the “Activate” screen of the Licensing wizard.
Note: Name and PC Serial Number information entered into the corresponding text boxes should be descriptive enough that they can be used in the future to identify this license in DSL.
Click “Activate.” The “License Granted” message box is displayed. Click “OK.”
To license Cat Electronic Technician offline:
Step 1 Select “Offline” as the connection method in the “Connection” screen of the Licensing wizard.
Click “Next>.” The “Choose Action” screen is displayed.
Step 2 Select “Activate” as the type of action to perform. Click “Next>”. The “Activate” screen is displayed.
Step 3 Enter the Activation information in the “Activate” screen of the Licensing wizard.
Note: Name and PC Serial Number information entered into the corresponding text boxes should be descriptive enough that they can be used in the future to identify this license in DSL. Click the “Save Request” button to save the License Request file.
Step 4 Provide the License Request file to the appropriate license administrator. The License Administrator will generate a response file necessary to complete the licensing process.
Step 5 When the License Administrator has generated and returned a response file, access the “Response File” screen in the Licensing wizard. This screen may be accessed by clicking “Next>” f rom the “Activate” screen of the Licensing wizard, or by selecting the “Utilities Load License Response File” menu option. Click the “Load Response File” button and load the response file
f rom the appropriate location. When the Response File loads successfully, the following message is displayed:
The response file has been successfully processed.
Step 6 Click “OK.”
Transferring a License
Important:
To transfer the service tool license from another PC, the Activation ID from the original license is required. Activation ID (case sensitive)
Instructions
Transferring a license is a two-step process. First, the existing license must be deactivated on the original PC. This may be done online or offline. Second, the license must be activated on the new PC using the existing Activation ID.
To deactivate the license in Online mode:
Step 1 From the “Utilities” menu, select “License Cat ET.” The “Connection Method” screen is displayed. Step 2 Select “Online”, and then click “Next>”. The “Choose Action” screen is displayed.
Step 3 When a license is active, the only option in the “Choose Action” screen is “Deactivate”. Click “Next>”. The “Deactivate” screen is displayed.
Step 4 Click the “Deactivate” button. The License is deactivated. The Activation ID can then be used to active a license on a different PC by following the Steps to License Cat ET.
To deactivate the license in Offline mode:
Step 1 From the “Utilities” menu, select “License Cat ET”. The “Connection Method” screen is displayed.
Step 2 Select “Offline”, and then click “Next>”. The “Choose Action” screen is displayed.
Step 3 When a license is active, the only option in the “Choose Action” screen is “Deactivate.” Click “Next>.” The “Deactivate” screen is displayed.
Step 4 Click the “Save Request” button to save the License Request file. The following warning will be displayed:
Warning! This operation will deactivate your license. The Cat ET service tool will no longer function with any applications. Are you sure you want to proceed?
Click “Yes” on the warning box to save to save the License Request file. This will cause the license to be deactivated.
Step 5 Provide the Deactivation Request file to the appropriate license administrator. The License Administrator will generate a response file necessary to complete the deactivation process.
Step 6 When the License Administrator has generated and returned a response file, access the “Response File” screen in the Licensing wizard. This screen may be accessed by clicking “Next>” f rom the “Activate” screen of the Licensing wizard, or by selecting the ”Utilities Load License Response File” menu option.
Step 7 Click the “Load Response File” button and load the response file from the appropriate location. When the Response File loads successfully, the following message is displayed:
The response file has been successfully processed.
Step 8 Click “OK”. The License is deactivated. The Activation ID can then be used to active a license on a different PC by following the Steps to License Cat ET.
Trainer
Purpose
Trainer runs the service tool in a training mode. This provides an opportunity to become familiar with the service tool without connecting to an Electronic Control Module (ECM) or a Communication Adapter. There is no charge for Trainer and authorization is not required.
Instructions
To use Trainer:
Step 1 Click the “Start” button on the Task Bar. Select “Caterpillar ET” f rom
the Programs menu, and then select “Electronic Technician” from the submenu. The Connection message box is displayed:

Step 2 Click the “Stop Connect” button. The Service Tool main screen is displayed.
Step 3 Select “Trainer” f rom the Help menu, and then select “Enable” from the submenu.

Or, click the “Enable Trainer” icon if default toolbar is set.

The “Trainer” dialog box is displayed:


Step 4 Select a product from the Application menu.
Step 5 To start Trainer, click the “OK” button. The Connection message box is
"Trainer Active" displays on the Title Bar
A Trainer Active popup displays when the trainer is enabled.


displayed. The ECM Summary screen displays in Trainer Mode if the default startup tool is set. Once started, Trainer simulates some of the service tool functions.
Note: When the service tool is operating in training mode, “Trainer Active” displays.
To change the product simulated within Trainer:
Step 1 Select “Trainer” f rom the Help menu, and then select “Properties” from the submenu. The Trainer dialog box is displayed.
Step 2 Select a different product from the Application drop-down list.
Step 3 Click “OK.” The Connection message box is displayed. The ECM Summary screen for the new product displays in Trainer Mode.
To exit Trainer:

Select “Trainer” f rom the Help menu and select “Disable” on the submenu or click the “Disable Trainer” icon.
What’s New
Purpose
What’s New provides a list of new functions and major enhancements available in the installed version of the service tool.
What’s New launches using a browser when it is selected from the Help drop down. It is displayed in the language selected as default in the Select Default Language dialog box during the installation of the service tool.
NOTE: The What’s New dialog box will automatically display each time the service tool is launched. Click the “Do not show this dialog again” checkbox to disable this feature.
Instruction
To view the What’s New screen, select “What’s New” f rom the Help menu. The What’s New screen is displayed using a browser.
Troubleshooting Tips and Error Code Information
Tips for Common Issues
Power Management - Communication to the ECM may be interrupted if the PC “suspends.” Turn off Power management (for example, a screen saver or “sleep” mode) when using the service tool.
Infrared Communication Problems - Computers supporting infrared communication may experience some communication problems with the service tool. Disabling the infrared option is recommended. Please contact the computer manufacturer for help with this procedure.
Disk Defragmentation/Disk Compression - The service tool will remain unaffected by Disk Defragmentation and/or Disk Compression as long as the defragmentation/compression programs do not move hidden files or system files during the process.
Administrative Rights - Administrative rights are required to a) install Cat Electronic Technician for the f irst time and b) upgrade from a previous release.
Installation Error
When calling for support, report the error code number to the support staff member. This will aid the support staff member in solving the installation problem. The table below lists the error code and a possible solution.
Error Code | Error Description | Possible Solution |
303 | License Validation Failed (An old serial number has been detected on this computer and cannot be updated). | Acquire a new license before upgrading. |
Selecting the Correct Port
Select “Preferences > Modify...”on the “Utilities” menu. The Preferences dialog box is displayed. Select the Communications tab.


Laptops:
If the laptop’s built-in pointing device is being utilized, the first available port is usually COM 1.
Desktop Personal Computer (PC):
If the PC has a mouse with a round plug, the first available port is usually COM.
If the PC has a mouse that does not have a round plug, the first available port is usually COM.
If the PC does not have a mouse, the first port is usually COM 1.
Communication Errors
When communication problems occur, one of two error messages will display:
“Unable to Communicate with the Caterpillar Communication Adapter!”
This error refers to a problem between the PC and the Communication Adapter. Suggestions for correcting the problem are as follows:
Check all connections between the PC and the ECM.
Check that the Communication Adapter is receiving external power. The product being serviced must have the key switch in the “On” position to receive power unless it is connected directly to the battery.
Under the Settings menu, select “Preferences” and verify that the correct port is selected. Also verify that the correct Communication Interface Device is selected.
If the error displays again, verify the correct cables are being used for the application.
If a serial port is being utilized, verify that the PC Comm Port is set up
correctly and is not in use by another device (for example, a modem). Try using another Comm port, if available.
“Unable to Communicate with an ECM!”
This error refers to a problem between the communication interface device and the ECM; the PC successfully detected the communication interface device.
Verify that all connections between the communication interface device and the ECM are secure and intact.
Verify that the ECM has power. If the error displays again, verify the correct
cables are being used for the application.
Cat Communication Adapter II Error Codes
When calling for support, report the error code number to the support staff member. This will aid the support staff member in solving the installation problem. The table below lists error codes and possible solutions to those errors.
Error Code | Error Description | Possible Solution |
--- | No initialization file present. | Install the Cat Communication Adapter II software on the PC and reboot. |
--- | Unable to read Cat Communication Adapter (RP1210) Initialization file. | If the PC has Cat Comm Adapter II software installed, try rebooting the computer first. If this does not resolve the issue, re-install the Cat Comm Adapter II Software. Reboot the PC after the installation is complete. |
--- | Unable to load CA2RP32.DLL | If the PC has Cat Comm Adapter II software installed, try rebooting the computer first. If this does not resolve the issue, re-install the Cat Comm Adapter II software. Reboot the PC after the installation is complete. |
142* | The interface hardware is not connected. | Check the cables. Make sure the data link cable and the serial or parallel communication cables are properly connected. Verify that the Cat Comm Adapter II “Power” light is on. Check that Cat Electronic Technician has been configured for the correct communications port. |
202 | A required INI File was not located. | Uninstall the Cat Comm Adapter II software, and then re-install it. Reboot the PC after the installation is complete. |
204 | A required INI f ile key was not found. | Uninstall the Cat Comm Adapter II software, and then re-install it. Reboot the PC after the installation is complete. |
205 | A necessary INI f ile key was not found. | Uninstall the Cat Comm Adapter II software, and then re-install it. Reboot the PC after the installation is complete. |
206 | An INI f ile value was invalid. | Uninstall the Cat Comm Adapter II software, and then re-install it. Reboot the PC after the installation is complete. |
Error Code | Error Description | Possible Solution |
230 | Port not open | Another program or device is currently using the comm port or the comm port’s resources. Identify the source and remove or disable it or use a parallel port instead of a serial port. Palm Pilot software commonly causes this error. |
231 | Invalid Comm Port | The selected comm port is not set up properly in the PC’s BIOS or operating system. |
301 | Cannot open the configuration file. | Uninstall the Cat Comm Adapter II software, and then re-install it. Reboot the PC after the installation is complete. |
302 | The session identifier was not found in the configuration file. | Uninstall the Cat Comm Adapter II software, and then re-install it. Reboot the PC after the installation is complete. |
303 | An error was found in the configuration file format. | Uninstall the Cat Comm Adapter II software, and then re-install it. Reboot the PC after the installation is complete. |
405 | The PC had a problem while trying to establish the communication baud rate with the Comm Adapter II. | Power cycle the Comm Adapter II and reboot the PC. If the problem persists, lower the communication baud rate. |
406 | The PC tried to establish a connection to the Comm Adapter II, but ran into a problem during the communication initialization phase. | This error code occurs during the communication initialization phase when the specific stage is not identified. Error codes 142, 405, 441, or 453 relate to specific stages in the initialization process. |
441 | The requested protocol is not compatible with an existing data link. | Cycle the power on the Cat Comm Adapter II and ECM. If this does not resolve the issue, reboot the PC and try again. Do not launch the Comm Adapter II Toolkit while Cat ET is running. |
443* | The drivers’ software and the communication adapter Firmware are not compatible. | Install the appropriate Firmware onto the Communications Adapter II. |
453* | The Communication Adapter has been detected but is not responding. | Using the Device Manager, Uninstall the COM port, and then detect new hardware to re-install it. |
Online Help
Purpose
The Help Contents function provides access to the online help file for the service tool. The f ile gives valuable information about each feature and provides step-by-step instructions for all service tool
functions.
Instructions
To access the Help contents, proceed with any of the following:
Select “Contents” f rom the Help menu.
Push the “F1” key (content sensitive)
Click the “Help” icon on the toolbar, if the default is set.
Select “Caterpillar ET” f rom the Programs menu, and then select “Electronic Technician Online Help” from the submenu.
NOTE: The service tool online help is content-sensitive. Push the “F1” key to display help for the active service tool screen.
Readme File
Purpose
The readme.txt. f ile contains last-minute information about the service tool. It can be found on the Install CD-ROM and is also displayed as an icon in the service tool Group Box.
Instructions
To access the Read Me File, perform the following steps: Step 1 Select “Cat ET” f rom the Programs menu.
Step 2 Select “Read Me” from the submenu. The readme.txt. file is displayed.
Cat Electronic Technician Distribution Website
Overview
Cat Electronic Technician is available on the following website locations:
Dealer.cat.com: https://dealer.cat.com/catet
Truck.cat.com: https://truck.cat.com
The distribution website provides:
Information about Cat Electronic Technician
Cat Electronic Technician and Communication Adapter software downloads
The most recent pricing guide, which includes part numbers and media number to order Cat Electronic Technician
PC Requirements to run Cat Electronic Technician
The latest support information for Cat Electronic Technician and Communication Adapters
PC Software Support
Customer Support Request
The Customer Support Request has been added to the service tool to assist in reporting issues to the help desk. If a problem is encountered with the service tool, perform the following steps to report the problem:
Step 1 Select “Submit a Customer Support Request” from the Help menu. The “Customer Support Wizard” dialog is displayed.


Step 2 Read through the dialog and then click “Next>.” Select the log file(s) to be sent to Support.
Step 3 Click “Finish.” An email will be created with the selected log files attached. Click “Send” to complete the process.
NOTE: To use a web-based email, log in, compose a new message, attach the compressed zip file, and send the email to Ebiz_Apps_Support@Cat.com.
Caterpillar Enterprise Service Center - Customer Service Support
Caterpillar Inc. provides a well-trained technical support staff to assist with any problems. If software support for the service tool is needed, please contact Caterpillar Enterprise Service Center. Be prepared to:
Give a brief explanation of the problem
Include the exact wording of any error or warning messages received
Give the sequence of steps taken before receiving the error or warning message.
Describe any recent changes made to the personal computer (PC) and explain whether or not the Service Tool was running correctly in the past. This will help isolate the problem.
Caterpillar Enterprise Service Center:
Email address: Ebiz_Apps_Support@Cat.com
Location | Phone Number | Languages offered (Time Zone) |
US and Canada | (309) 578-6789 Toll-Free: (855) 391-1778 | English: 24x7 |
Mexico | +52 8183 192847 | Spanish: 11:00PM Sun – 11:00PM Fri (Central) English: 24x7 |
Brazil | +55 1921 061048 | Brazilian Portuguese: 6:00AM – 10:00PM Mon-Sat (Brasilia) Spanish: 11:00PM Sun – 11:00PM Fri (Central) English: 24x7 |
UK | +44 17335 83500 | English: 24x7 French: 11:00PM Sun – 11:00PM Fri (Central European) German: 7:30AM – 4:00PM Mon-Fri (Central European) Italian: 9:00AM – 5:00PM Mon-Fri (Central European) |
Belgium | +32 7125 1603 | French: 11:00PM Sun – 11:00PM Fri (Central European) German: 7:30AM – 4:00PM Mon-Fri (Central European) English: 24x7 |
Germany | +49 4023 803025 | German: 7:30AM – 4:00PM Mon-Fri (Central European) English: 24x7 |
Italy | +39 0248 422626 | Italian: 9:00AM – 5:00PM Mon-Fri (Central European) English: 24x7 |
Spain | +34 954 418708 | Spanish: 11:00PM Sun – 11:00PM Fri Brazilian Portuguese: 6:00AM – 10:00PM Mon-Sat (Brasilia) English: 24x7 |
China | +86 2258 096140 | English: 24x7 Mandarin: 8:00AM – 5:00PM Mon-Fri (Chinese Standard) |
Australia | +61 7332 98277 | |
Singapore | +65 6828 7697 | |
Thailand | +66 2105 5197 | |
Indonesia | +62 2182 39805 | |
Bangalore | +91 80 3350 3940 | |
Chennai | +91 44 3999 2165 |
Updated February 6, 2020